

If when rolling back a carpet you are presented with good condition floorboards you may want to consider leaving them exposed. Restoring wooden floorboards is a great way to showcase some original character and to give a room a traditional feel. We did just this in our main living room. The wood condition was exceptional and it would have been a shame not to show it off. Restoring old floorboards is something that you can do yourself with all tools readily accessible but be aware it’s a lot of work! In this post I discuss the the tasks we undertook on our floor to bring it back to life. We look at the steps needed for sanding and the finishing products used.
What is the Victorian Project all about? Find out here.
Common Victorian Floorboard States
Before you can get stuck in with restoring original floorboards it is important to know what you are likely to be dealing with. This may be different from house to house and dependant on the period your property was built. We pulled back a number of the carpets around the house and found the same story beneath each. [See also: Plaster, Putty & Paint – The Living Room Walls]
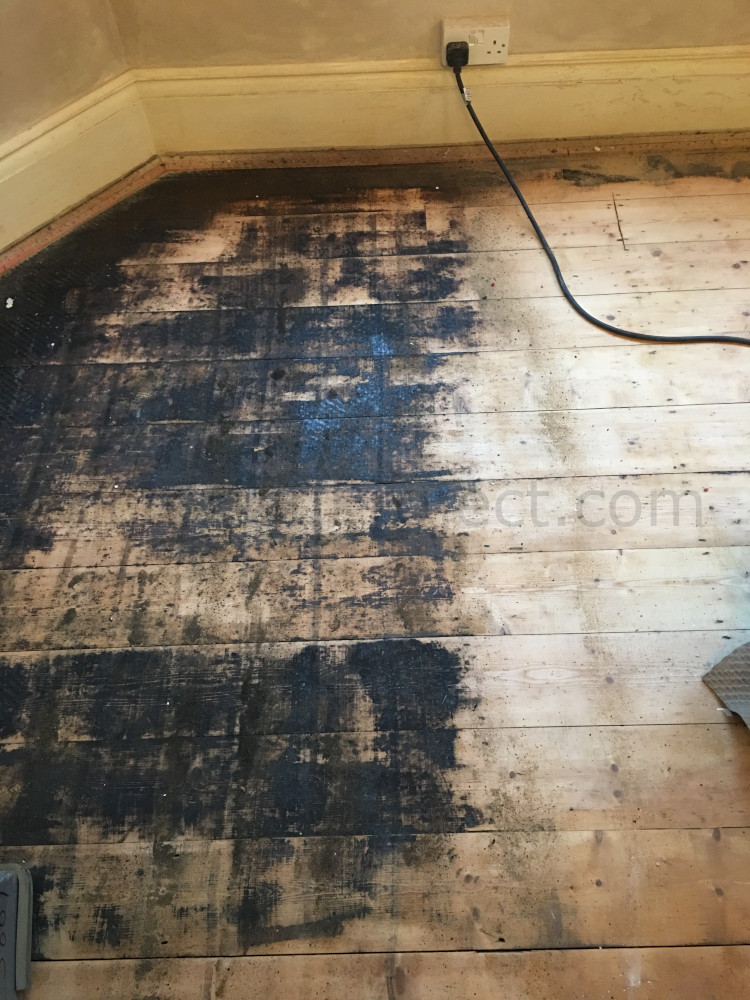
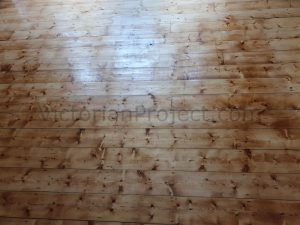
The floorboards looked in good condition but around the perimeter of the room were covered in what looked like a black gloss paint. There was a small exposed (unpainted) square in the centre of each room. This centre square had no covering and was really just discoloured wood. [See also: Repairing Lime Plaster Walls – Hiding The Cracks]
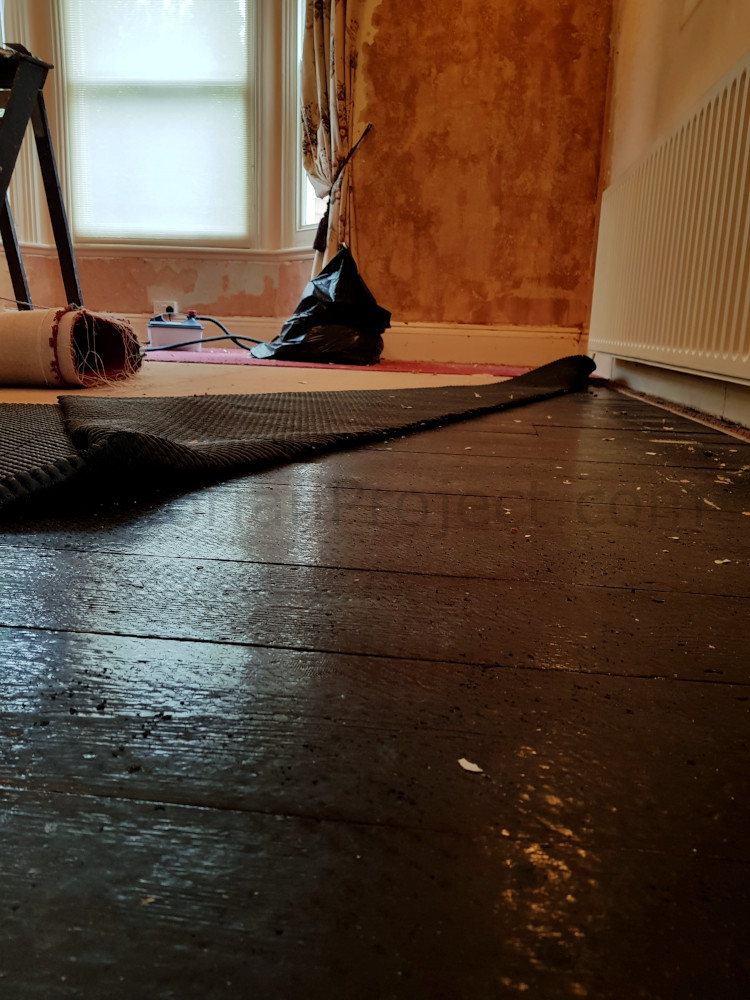
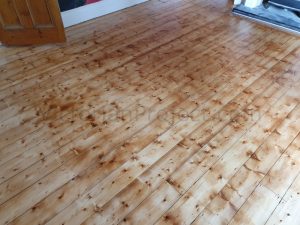
In the image below you can see this exposed square in the centre of the room where we have rolled back the carpet. [See also: What To Do With A Wallpapered Ceiling? Be Careful!]
Initially we did not know what this was or the reasoning behind it as we were new to this but the positive was that that it had protected the floorboards for many decades. As usual we visited our friend Google & it suggested that it was common during the Victorian period to have black flooring with centre exposed to be covered with a rug. I’m not 100% on the validity of this but it is widely suggested.
If you have the same black material or any type of covering it is important to know what it contains before you remove it. Some old paints contain harmful components such as lead and it was also suggested that tar based coverings were used. You can get samples tested. Knowing what the product is will both protect your health and also suggest the best way to remove it. [See also: How to Paint a Ceiling – Simple Rules & Direction]
Sanding Wooden Floorboards – Removing the Paint
For us, this was new territory & we had no clue as to the right equipment required for the sanding job. We had access to many different sanders designed for home use but these simply won’t cut it. You need proper kit both for the power and to ensure your sanding is even. Also you should always use belt sanders for this task. Vibrating sanders are useless here and disc sanders will leave the surface uneven.
After much trial and error we completed the job with 3 sander types. A push along sander specifically for sanding wooden floorboards, a hand belt sander for doing the edges and a thin belt sander for hitting those hard to get details and we used them in this order. A few more tools are needed for restoring old floor boards detailed below. [See also: Fix Damp in Victorian Houses and the Common Causes]
- A Push Belt Sander – To sand the main space.
- A Hand Belt Sander – To sand the edges.
- A Thin Belt Sander – To sand difficult spots.
- A Hammer – To remove nails.
- A Chisel – To remove carpet grippers.
- A Pair Of Pliers – To remove staples.
- A Paint Brush – To apply the finishing product.
These can be purchased if you have a number of floors to do or your local tool hire shop will kit you out. [See also: Mist Coat Ratio & Painting New Plaster]
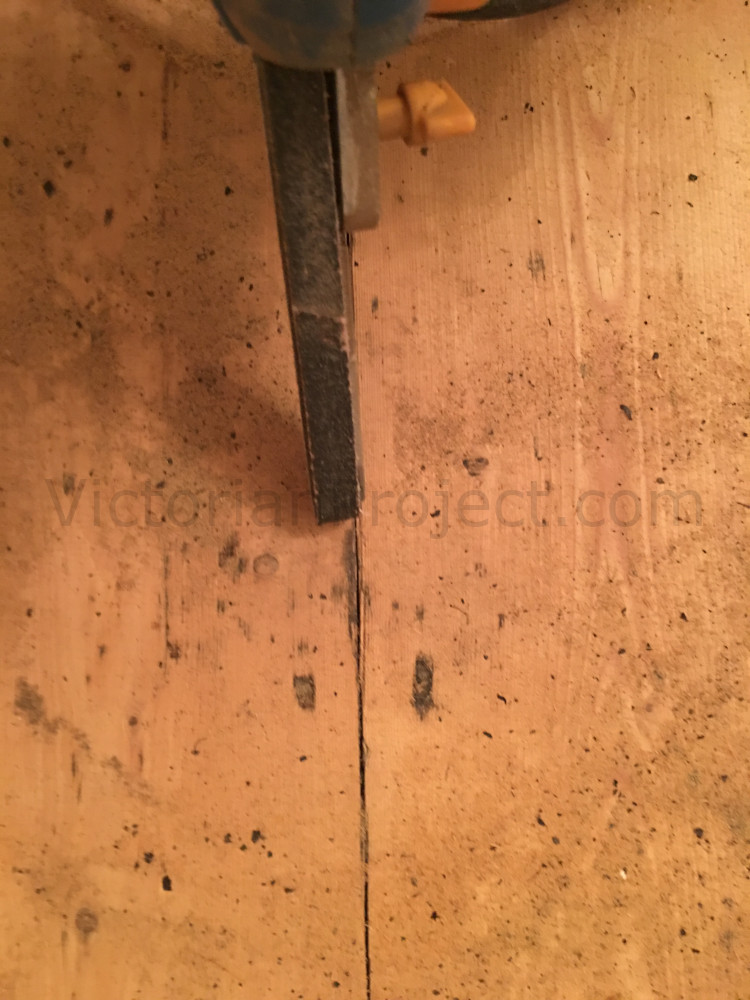
Prepare The Area – Remove All Nails, Staples & Carpet Grippers
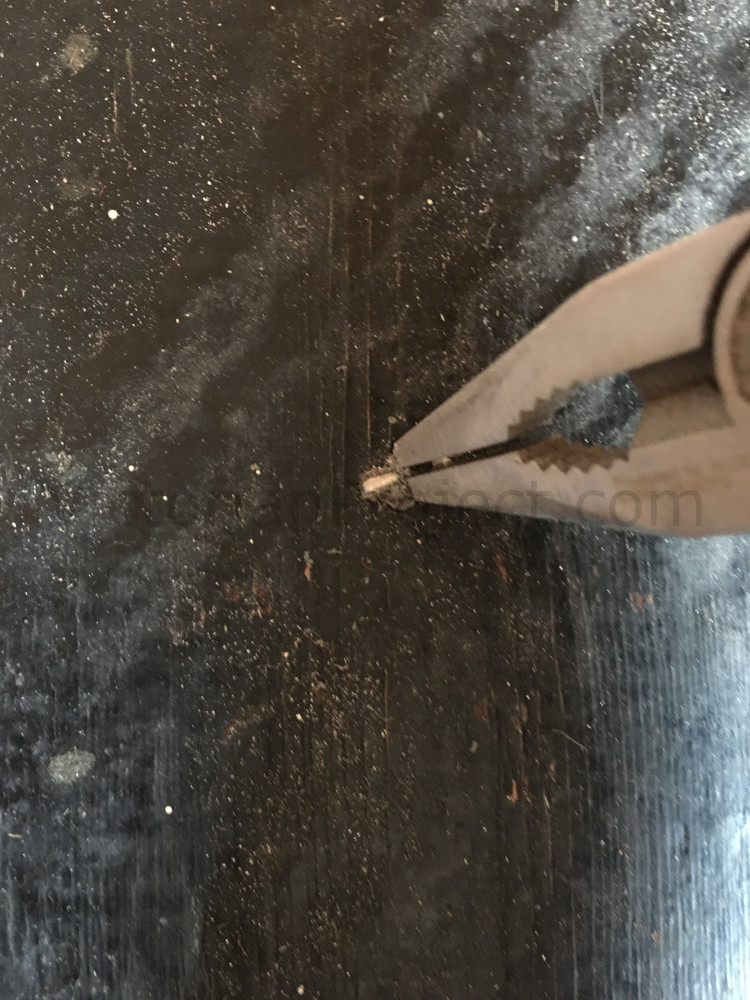
When you remove the carpet/covering it is likely that the space will be littered with nails & staples. These must be removed before any sanding can start. If you hit a nail with a belt sander you will tear the sanding sheet and you will end up using many more than you need to. This stage is simple, grab a hammer & a pair of pliers & get on your hands and knees. Slowly work your way around the full floor space locating any nails & staples and remove. Ensure that no area is left uninspected. [See also: Breathable Paint For Lime Plaster – What Are The Options?]
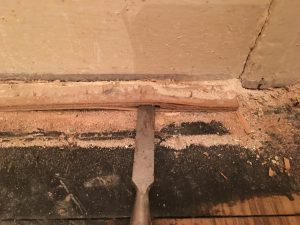
As you won’t be having a new carpet the grippers around the perimeter of the room are no longer required. These are usually fitted with nails. They can easily be removed with a hammer & chisel. Position the chisel at the base of the gripper adjacent to each nail. Now tap it with a hammer until the chisel is nicely under the gripper. Then prise it up until the nail comes out. You can remove all carpet grippers from a room in under 10 minutes. [See also: Open Up A Fireplace & Log Burner Installation]
The Main Sand – Course Grit Paper
Once the area is clear from nails, staples and any other form of debris its time for the main sand. For this task it is imperative that you wear sufficient protection. Sanding wooden floorboards will inevitably create huge volumes of dust and there is no avoiding this. Get yourself a good quality respirator and wear goggles! For this step we are going to sand the bulk of the floor and used the push belt sander built specifically for restoring old floorboards. These are inexpensive and we picked ours up for just £35 for 24 hours from our local tool store. [See also: Earthborn Clay Paint Review – Breathable & Eco Friendly]
We planned to sand the full floor space twice, once using courser 80 grit sand paper to remove the black paint and take any imperfections out of the wood & once using finer 120 grit sand paper to smooth off & finish. This sander is a beast and when the roller hits the floor it will move so ensure that you are ready! Starting with the 80 grit walk the sander up and down then room. Get as close to the wall as possible but without touching the skiting boards. [See also: Victorian Roof Repairs – Starting Point for any Renovation]
It is important here to go with the grain and in the direction of the boards. Very old floorboards may be warped and it can be tempting to go across the boards to hit spaces that are missed. If you do this the finish will be uneven. Just repeat in the board direction and eventually all areas will sand. If you have a paint covering like we did it may take some time for it to be fully removed so let the sander do the work. [See also: Should Lime Be Used for Victorian Houses? Lime vs Gypsum Plaster]
The Main Sand – Finer Grit Paper
On completion of the first sand we had removed all of the black paint. We were presented with the original wood with few imperfections. It was now time to smooth it off and get the right finish. We loaded up the sander with the finer 120 grit paper and started over. Once again, starting at and edge and working in the direction of the grain. With this task you are looking to get the boards nice and smooth and ready for coating. This shouldn’t take as long as the first sand and is quite rewarding.[See also: Broseley Serrano 7 SE Review – Our Log Burner]
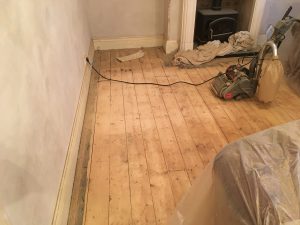
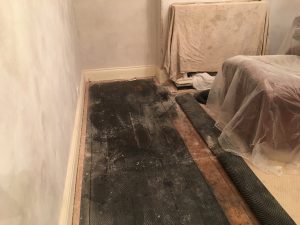
Edging & Clearing The Perimeter

When you get this far the bulk of the floor space will be smooth exposed wood but you will have an untouched line around the perimeter. You cannot do this with the push sander without wrecking your skirting boards so now you will require a hand belt sander. For this sand we would once again do two runs with the 80 & 120 grit papers. For two of your four edges it will be difficult to follow the direction of the boards because the wall goes across each panel. Do what you can here. As we had some stubborn black paint to remove on these edges we sanded parallel to the wall with the 80 grit paper but then finished, board at a time with the 120 grit in the direction of each board. [See also: Ivy Invasion – Removal from Bricks, Roofing & Gutters]
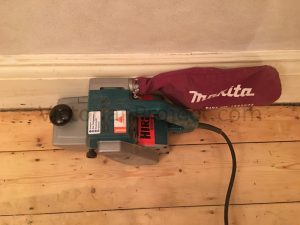
Hitting Those Hard To Get Patches
After what felt like an age we had now got our floorboards fully on show and smooth. There was a nice fresh smell of wood in the air. Our floor was nearly there however when sanding wooden floorboards there will always be small patches missed by the heavy duty sanders. These were mainly places where the wood had sunk in or along board edges. To hit these spaces we used a thin belt sander and made our way round each. Although smaller the thin belt sander will dig the wood out so ensure that you go no further than removing the paint surface. When all of these patches were complete our floorboards were ready for finishing. [See also: Remove Stubborn Wallpaper – Stripping Back]
Finishing the Floorboards
Before you can apply any finish to your wood you need to ensure that the area is clean. This level of sanding creates mess! The floorboards will need to be mopped a few times with clean water and allowed to dry. Also you will find dust all over the place, on skirting boards, picture rails, curtain rails etc etc. When restoring original floorboards the clean up job will take a big chunk of your time. Unfortunately it must be done.
Floorboard Finish Options
When restoring old floorboards you have a number of finishing options and there is a lot to consider. Wood stains are your first option. These are easy to apply and do little more than colour your wood offering no protection to its surface. What’s more, stains tend to highlight imperfections so if your sanding job isn’t top notch it will let you know. At the other end of the scale are the varnishes. These are the most protective finishes putting a solid layer between the wood and things that will sit on top of it. They often produce a glossy finish and one of the real downsides is that you cannot apply touch-ups. In 4 years or so, you will need to sand and refinish the full floor space.
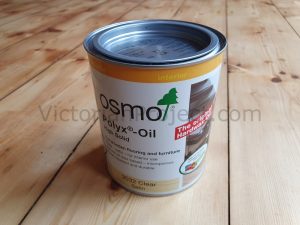
After much reading and deliberation we decided to pick a product that sits between these two options. A product that does offer some protection but also supports patch touch-ups for future wear an tear. We went for a Hardwax Oil by Osmo. Its reviews are good suggesting easy application, a good finish and a decent level of protection for the floor that we had spent days sanding back.
Applying The Osmo Hardwax Oil
Following the vendor guidance for the floor space we needed to cover were purchased 2x 0.75L tins of of Osmo Hardwax Oil. For the best protection we would need to apply 2 coats of the stuff. For application tools you have the option of using a rag/cloth or a large brush. Osmo do provide purpose built application brushes but there is really little difference between these and standard brushes. Plus they are expensive! We decided to use a large standard paint brush here and due to the size of area to cover selected one of a decent size.
Application of Osmo Hard Wax Oil is straight forward. Starting in the corner of the room opposite the door we began working the product into the wood. Applying thinly ensuring that the spread was even and that there were no pools collecting where the wood had sunk. It is important that you take your time making sure that no areas are missed. It ‘should’ go without saying but make sure that the route you take means that you finish at the door! There are some great Youtube videos showing people who didn’t 🙂 .
The recommended drying time for Osmo Hardwax Oil is 8 hours. To ensure that it was sufficiently dry to walk on we returned the following day and repeated the process for the second coat. Note that Osmo Hardwax Oil is solvent based and does have a strong smell to it that will last for hours. Make sure that you ventilate the space and take the necessary precautions to protect yourself. On completion of the second coat our finish was complete.
The Final Stage Of Restoring Wooden Floorboards – The Finishing Touches
So our floor had been nicely sanded & the finish applied. There was now just a couple of finishing tasks required to complete the job.
Applying A Trim To Compliment The Skirting Boards
When sanding wooden floors back it can often be very difficult to get right up to the skirting boards. The sanders required have a kick to them and you run the risk of damaging the skirts if you get too close. We found that despite our best efforts there was still a very tiny but noticeable amount of black paint around our edge. Rather than bantering the grand old skirts we decided to finish the room with a trim made with edging beads.
We measured up and selected beading that complemented our skirting boards. We then purchased enough to place around the full perimeter of the room. Once you get going, edging beading is simple to cut to size using a fine saw & mitre block. Our room edge has internal corners, external corners and a window bay with varying angles to cut. A good mitre block will cater for all of these. We cut all pieces to size before any were secured.
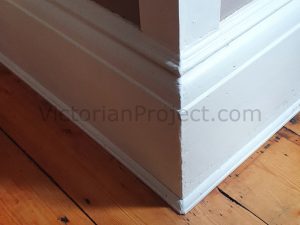
Once cut the edging beads needed a finish. We experimenting using both the Osmo Hardwax Oil to match the floor & straight white paint to match the skirting boards. When positioned in place it was clear that the white paint gave the better look and added to the grandeur of the skirting boards. We painted all pieces, allowed time to dry and then secured each section with pins. The pins ensured that they were firmly fixed but the lack of glue means that they can be easily be removed should we want to change the or redo our floor. The trim gave a great finish to our floorboard restoration.
Filling the Gaps To Stop Draft
Now for the awkward job when restoring wooden floorboards but something that is well worth doing…
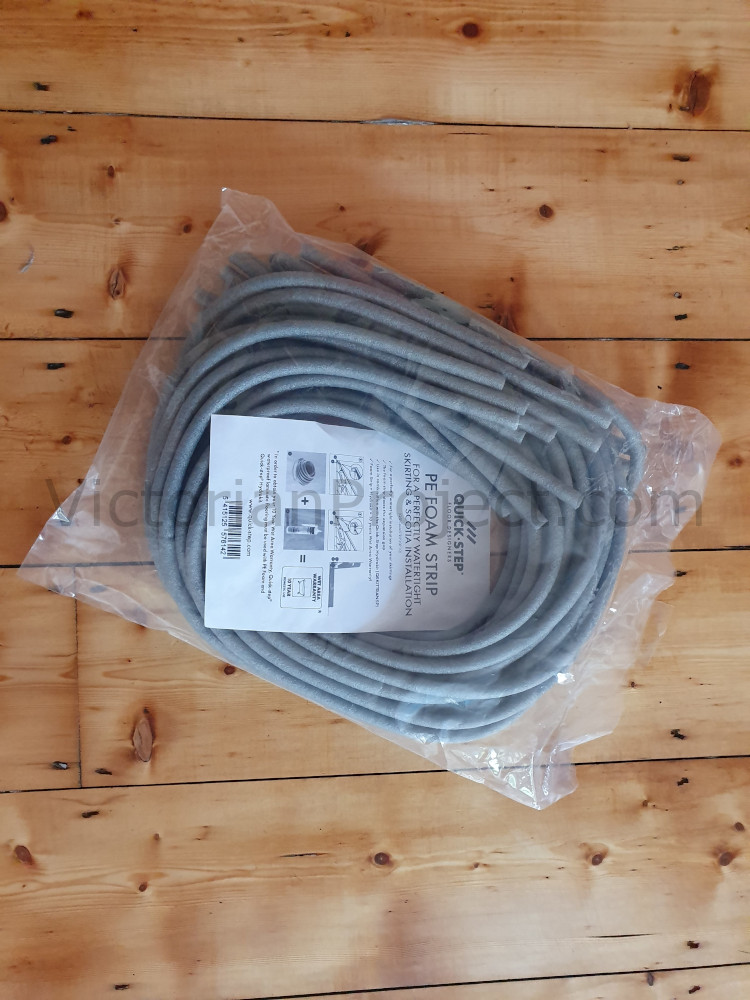
Old wooden floorboards can be warped, have bits missing or simply not meet each other perfectly. Modern wood floors are made using interlinking boards that lock in together and cut out any draft. The room in this post is located above a cellar and it was therefore vital that we took action to fill the gaps. There are a few ways that you can do this. There are glue/resin products that you can inject into the gaps but like with the trim pins we wanted something that could be easily taken away if ever we needed to redo our floor.
We opted for some Quick-step Foam Expansion strips. These come in foam tubes which can be used in their entirety or cut to fill those tighter gaps. Down on our hands and knees and using a credit card we worked our way around every board edge squeezing in the foam. It took around half a day and on completion none of the foam pieces were visible. If you hover your hand around the floor surface you can immediately feel the difference and lack of draft as a result. This job is time consuming but well worth it and will keep your room warmer.
Restoring Original Floorboards – Roundup
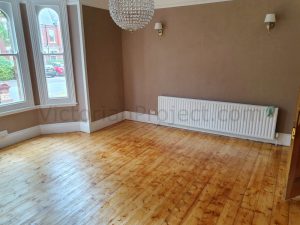
Exposed original floorboards look fantastic in old properties and bring with them a real sense of tradition. Restoring wooden floorboards is something you can undertake with little experience and all required tools can be hired without too much expense. It will need some graft however and it is a messy job to say the least. The image below shows our finished article after the two coats of Osmo Hardwax Oil had bedded in.
If like us when you expose the floor it is coated in some sort of protective covering ensure that you work out what it is and wear suitable protective gear. Depending on what the covering is the sanding dust could be harmful so take precautions!
Always sand in the direction of the boards. It may be tempting to cross the boards for those bits that won’t seem to sand but you will get a better finish if you don’t. Triple check that you have removed all nails, staples and screws before you begin. Otherwise you will find yourself constantly changing your sand paper.

When choosing your finish, look at the pros and cons of each of the available options and choose a tone that will compliment your wall paint or paper. As you can see from the above image we had many colours in our wall mural to think about. Finally, exposed wooden floors can be drafty so take the extra time to address any gaps. It will be well worth it for those winter months! Restoring original floorboards shows off part of the property that has been their since build and depending on the size of your rooms can be significantly cheaper than carpet.[See also: Fitting a Wall Mural & Creating A Feature Wall]