

The first room in our Victorian renovation journey and one of the most important. Transformation of a dull & damp space into something vibrant & warm. Our Victorian living room design aim was to rejuvenate original features hidden away for decades & to adopt traditional renovation techniques wherever possible. To create a functional space to spend a lot of time in. This article covers our transformation & some of the Victorian living room ideas used.
What is the Victorian Project all about? Find out here.
See our BEFORE article @ Main Living Room Transformation (Before) – Decorating Begins
The start of our challenge was old décor unchanged in at least 40 years. Difficult to remove wood chip wallpaper on top of traditional lime plaster that would to take some time & effort to shift without damaging the walls somewhere beneath. A bricked up fireplace with a makeshift hearth constructed from an old kitchen worktop. And numerous damp patches to resolve on multiple external walls. All of this with very limited prior experience.
A full BEFORE & AFTER slideshow gallery of our living room transformation can be found at the end of this post.
Traditional Lime Plaster Job To Provide A New Canvas
This was the first room that we got stuck into & we were new to tackling damp. The room had a number of damp areas to address. Interestingly, the living room remained the only room left in the house to have never been re-plastered during the 130 year life of the property and still showing the original lime plaster. After removal of multiple layers of tough wall paper, some areas needed some sort of a skim. [See also: Should Lime Be Used for Victorian Houses? Lime vs Gypsum Plaster]
Also, the new fireplace (discussed later) needed properly plastering in as it was inevitable that there would be some damage caused to the wall on installation.
After many hours of reading into addressing damp we made the decision to stay with the lime. The benefits of lime for damp management justified the additional expense and lime plastering does not come cheap. Your are looking at around three times the price of a standard Gypsum skim and it takes a lot more time to do. A single wall plus the new fireplace were completed with the traditional lime job. This required an extensive search for a suitable plasterer skilled in the use of lime products. Many quoted the job but gave the impression their experience was limited. We wanted someone who really knew what they were doing. [See also: Fix Damp in Victorian Houses and the Common Causes]
Paint Colours & Powerful Mural
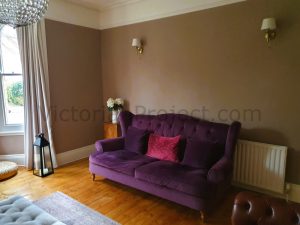
From very early on we wanted a statement piece in the living room. Something a little brave and something to make the main space of the house stand out. A painted effect floral wall mural provided this in a position to dominate the room providing a flood of vibrant colours. The mural gives a busier feel to one side of the space & contrasts nicely with the single tone painted walls. The mural selection came at the start of our Victorian living room design phase. All other colour tones in the room were then chosen to compliment and align to this. [See also: Plaster, Putty & Paint – The Living Room Walls]
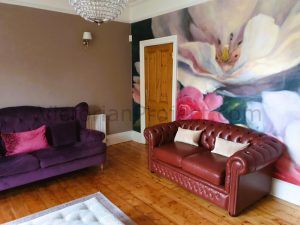
With the age old wallpaper gone, the remaining walls were refreshed with a lick of Earthborn Clay paint in the ‘Muddy Boots’ colour. Earthborn Clay paint selected for its natural breathable characteristics. This would help with the damp patches and would work in conjunction with the lime plaster to provide the best possible moisture management system. The ‘Muddy Boots’ colour gives a warm cosy ambiance & its neutrality allows it to work with the many tones of the mural. [See also: Fitting a Wall Mural & Creating A Feature Wall]
The Ceiling
The ceiling was papered and wanting paint throughout instead of wallpaper we ripped it down. Removing ancient paper from lime plaster is a tough job and in doing this we did a fair bit of damage to the ceiling. Once the paper was down the ceiling resembled something like the surface of the moon. We were left with two choice here. The first was to have the ceiling replastered. We decided against this because any form of over-boarding on top of the lime plaster would impact the original cornicing. The second option was to bite the bullet, fill the larger craters and reapply some more modern lining paper. It was this appraoch we took. [See also: What To Do With A Wallpapered Ceiling? Be Careful!]
Once fitted the new lining paper was painted in an off-white colour which we took down the walls to the picture rail. Many advise that if you do this it will make your ceiling height feel less but on completion we didn’t see too much impact. [See also: How to Paint a Ceiling – Simple Rules & Direction]
The Wood – Floorboards & Doors
Beneath the old carpet the original floorboards were in fantastic condition and it just made perfect sense to expose & show them off. Using an artillery of power tools and a whole load of graft we sanded back and smoothed off the boards. We spent a lot of time deliberating over both the floor finishing products and the colour tone. We finally settled on a solution that we had not come across before in Osmo Polyx Hard Wax Oil. Osmo Oil is designed to bring out the natural character of your wood. This was fitting and right for original floorboards in such good condition. [See also: Restoring Wooden Floorboards & Finishing – No Pain No Grain]
The Oil is available in a small range of colours/sheens and once again, whichever tone we used had to align with the wall mural and now the chosen wall paint. We decided to remain natural and opted for Clear Satin which seemed to fit the bill. The finish is a smooth, permanent wet look which is not too imposing. The colour connects well between the floors and walls. The same product was also applied to the single door. To complete the floor, foam strips fitted into any gaps would remove draft and a beading trim applied to the floor perimeter. [See also: Osmo Polyx Hard Wax Oil Review – Floor & Furniture Finish]
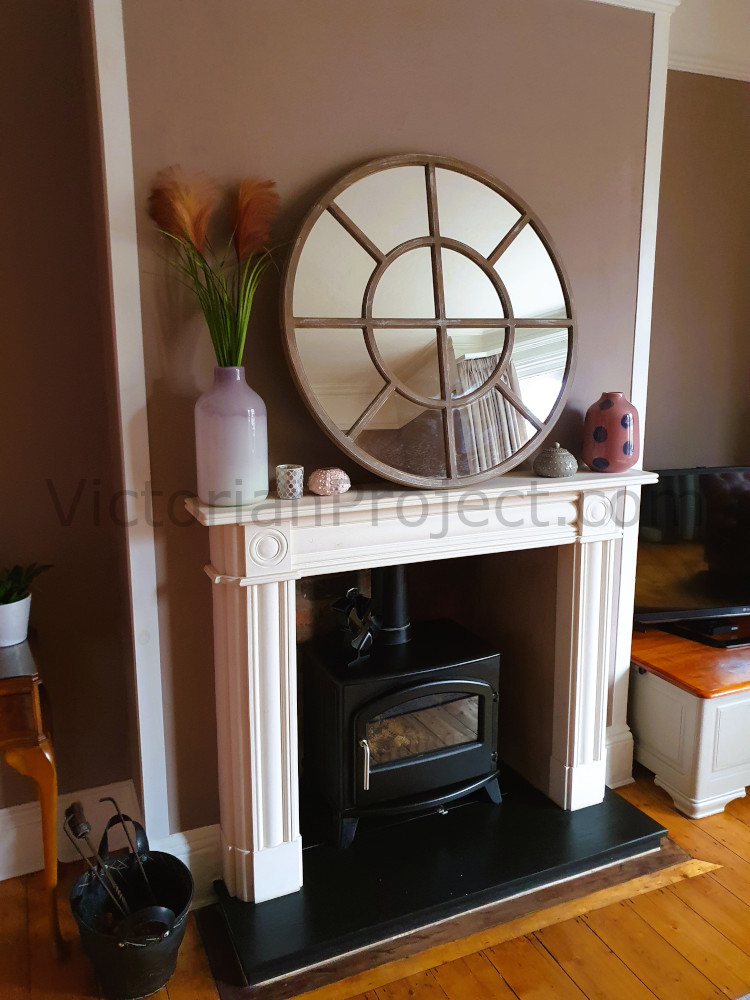
Fire Place – The Centrepiece
Perhaps the transformation we are most pleased with is our fireplace. When we found it, it was in a bad way. We were told at purchase that the original fireplace surround had been stolen at some point in the properties history. Quite how you would do that I don’t know!
A cheap, thin, plaster surround stood in its place and the opening bricked up and hidden away when open fires became less trendy. To fully finish it off, a makeshift hearth constructed from an old kitchen worktop turned a centre piece into an eyesore. It really would have been difficult to make a worse job of it. Such a shame.[See also: Open Up A Fireplace & Log Burner Installation]
We had to put this right and return the fireplace to a feature rather than a mess. We removed the bricks to open it back up and the internal side walls rendered. As the original brickwork on the back wall was in good condition, a bit of cleaning up put them on display and saved the expense of fireboards.
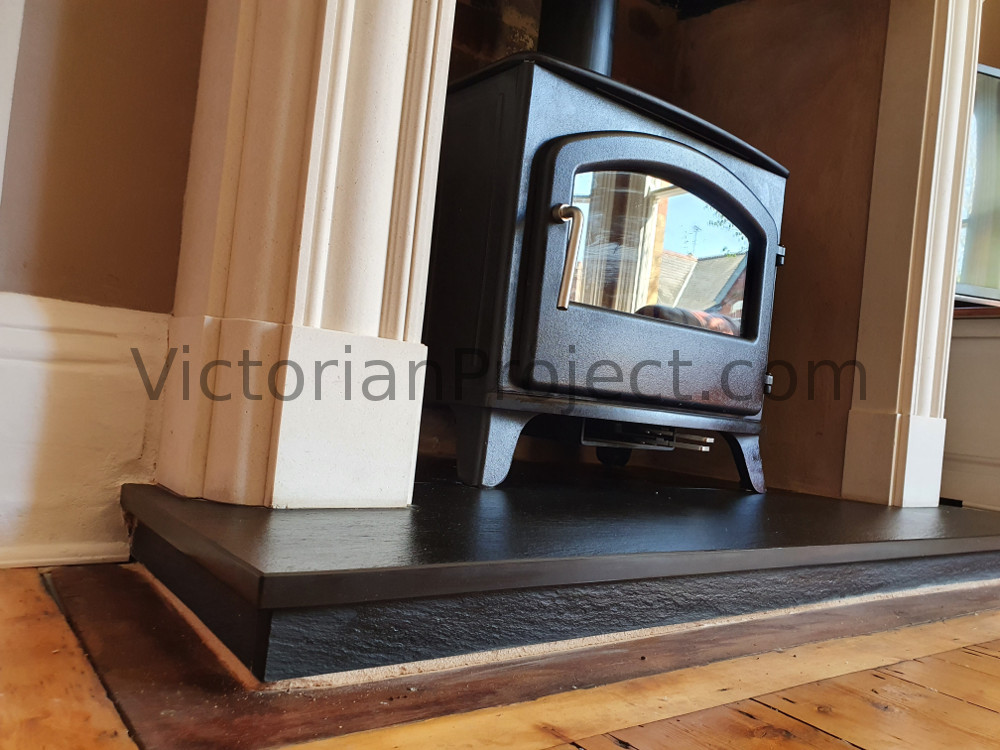
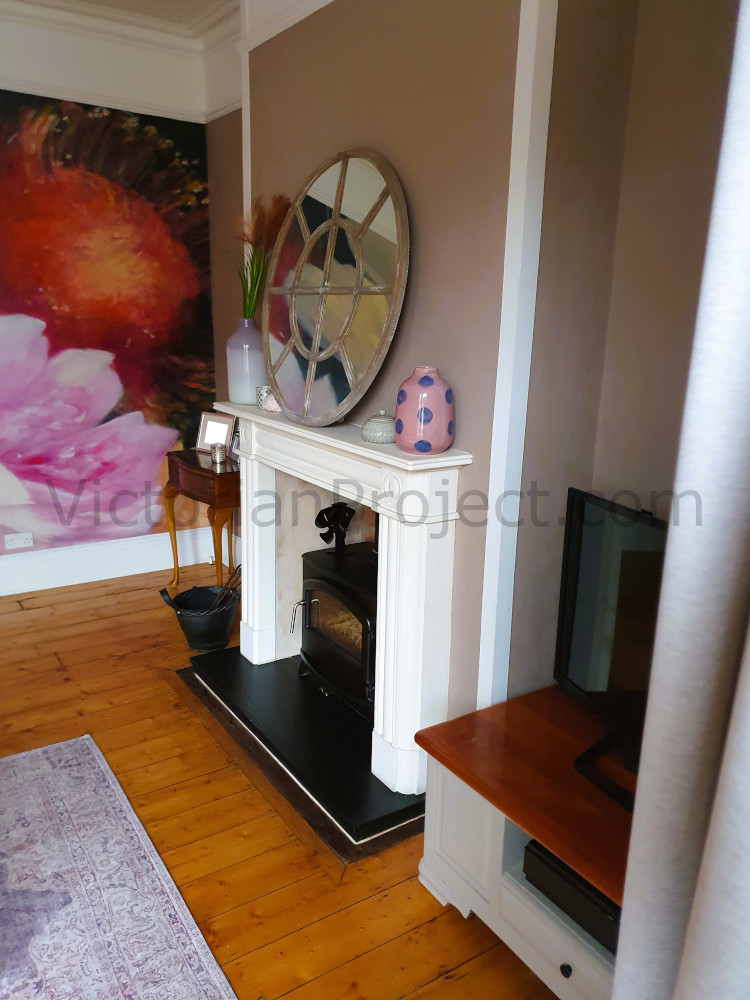
We wanted a grander fire surround and something that would do far more justice than the thin plaster thing we had removed. These can be expensive but we sourced a fantastic looking Aegean Lime Stone surround from Ebay for just a few hundred pounds. It had never been used and was in perfect condition. The image to the right gives a good perspective of the depth of the new surround.
Being Aegean Lime, the new surround was very porous and so extra care was needed when plastering in and painting. We needed strong words with the plasterers to ensure that it was protected throughout the work.

Log Burner Installation
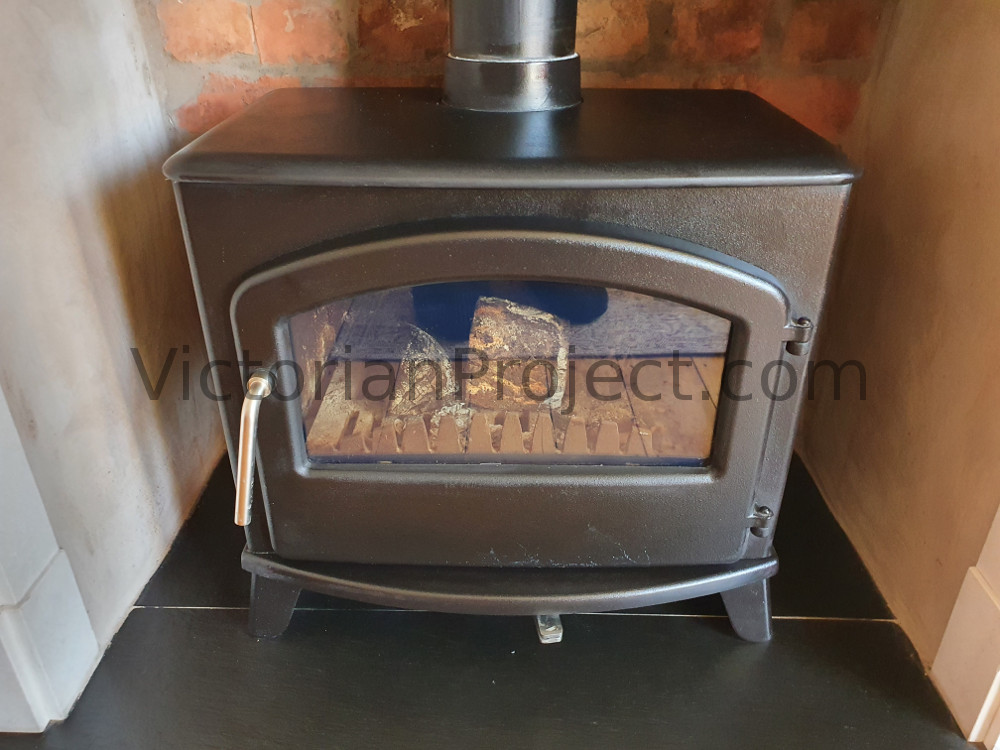
It was always on our Victorian living room ideas list to have a wood burning stove in the main living room. We selected the Broseley Serrano 7 for its look, perfect fit to the opening and its features. It was also right in terms of wood burner heat output to sufficiently heat the room.
All fireplace features were seated onto a cut to size Welsh slate hearth to maintain the traditional look. We did toy with granite but felt the slate better complimented the wooden floor boards.
From a hidden away bricked up bodge to a traditional and functional feature. [See also: Broseley Serrano 7 SE Review – Our Log Burner]
Fixtures, Fittings & Furniture -Victorian Living Room Ideas
We were very lucky that the living room had many original decorative features and it was massively important to retain these.
The room dominated by a huge detailed ceiling rose surrounded by deep cornicing. Both of these we have left in place but freshened up and brought back to life with a bit of filler surgery and paint. The main living room is the biggest room in the house and a large ceiling rose was really necessary to make the ceiling space less sparse.
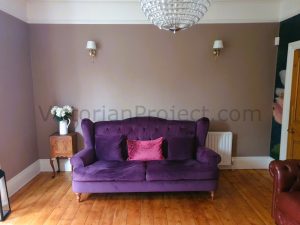
It is important to remember that a ceiling rose can dictate the lighting you can hang from it depending on the inner circle diameter. We were very fortunate with this as the lighting we wanted (shown right) just so happened to perfectly fit the ceiling rose.
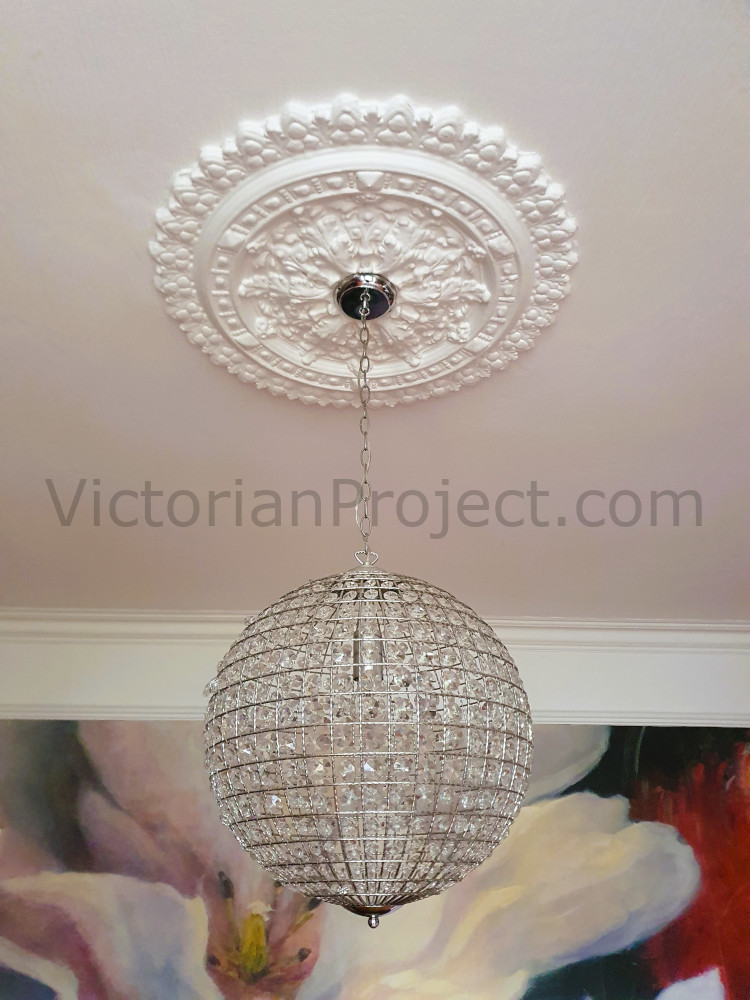
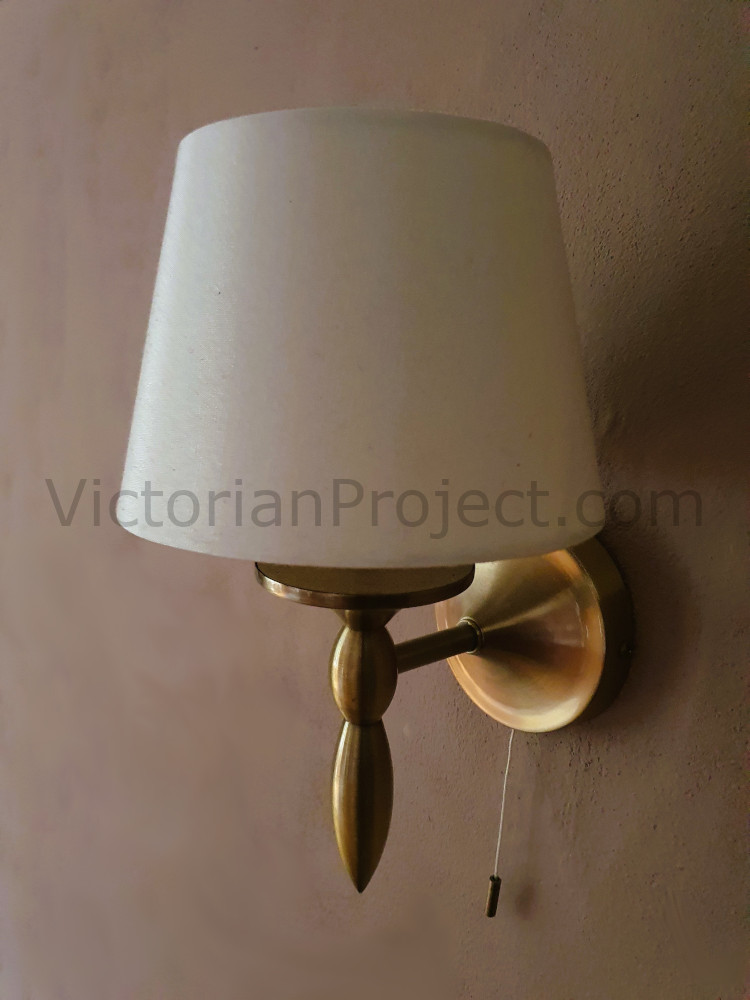
All lights in the room have been replaced. Both the chandelier and wall lights were unfortunately a little too dated for the room we were trying to create. We still wanted a chandelier though. So out with old and a new glitter ball chandelier now has pride of place shown in the image above. It continues to work with its surroundings but is far more modern than its predecessor. The ancient candlestick wall lights replaced with a more discrete option. A little more subtle on the wall. Both standard light switches replaced with dimmer switches allowing us to create different light ambiences. [See also: Breathable Paint For Lime Plaster – What Are The Options?]
Extra Features – The Trimmings
A few extra Victorian living room ideas to note… Very often with an old property you have to work with what you have and you need to be able to adapt.
Moving from wallpaper to paint whilst staying with the original lime plaster meant that some ugly looking wooden corner beads needed some way of concealing. These could be taken out but would require plastering re-work to take the plaster to the corner edges. Again, these are lime plaster walls and so such work would come at a cost. We tackled these with some custom cut timbers, finished in white to align with the ceiling and skirting boards. These are shown in the image to the right and you can see how they stand out. The idea was to avoid re-plastering, work with what we had and transform another eyesore into a feature. [See also: What To Do With Wooden Wall Corner Beads?]
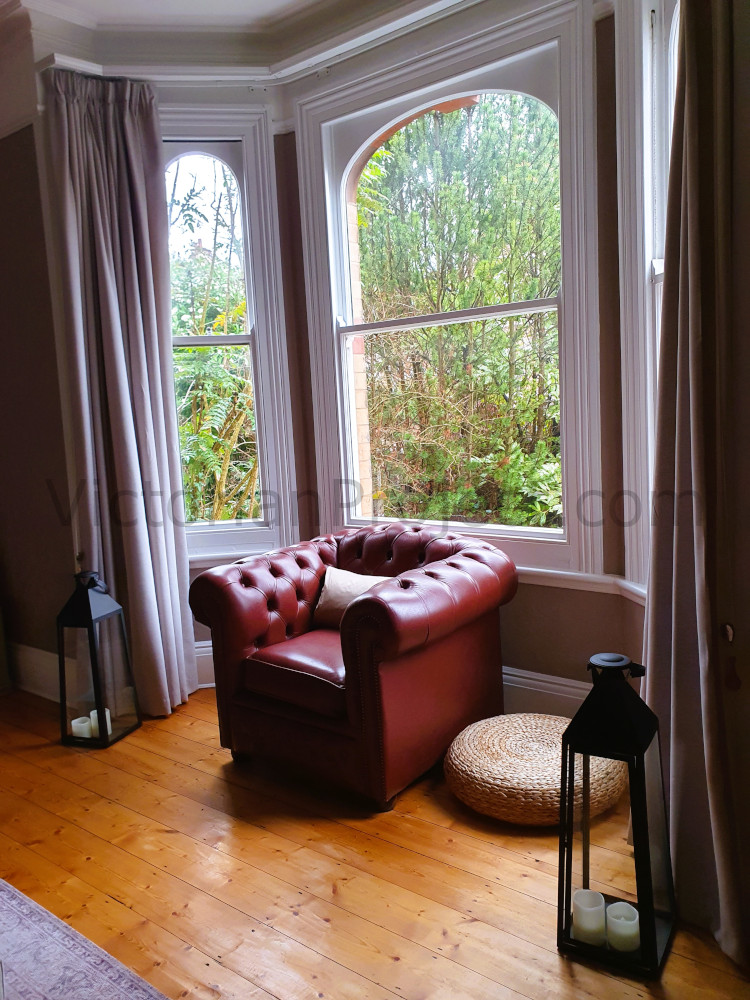
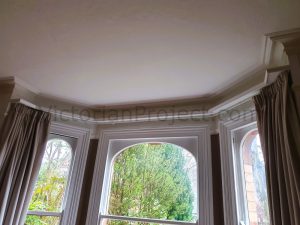
Replacement curtain rails for old Victorian bay windows can be expensive because of the need to have them made to measure. A coat of white paint & fitted with a decorative moulding trim rejuvenated the old curtain rails to keep the costs down. Some simple creative work here saved us a pretty penny. [See also: Victorian Roof Repairs – Starting Point for any Renovation]
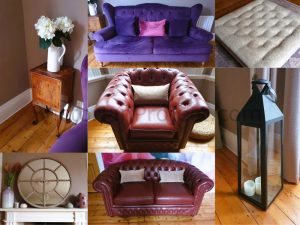
Throughout the space we wanted traditional furnishings which were sourced from various places that worked with the new colour schemes. Many of which were old and pre-loved.
Main Living Room – Before & After Gallery
Watch the below slideshow to see all of our Before & After Victorian living room transformation photographs.
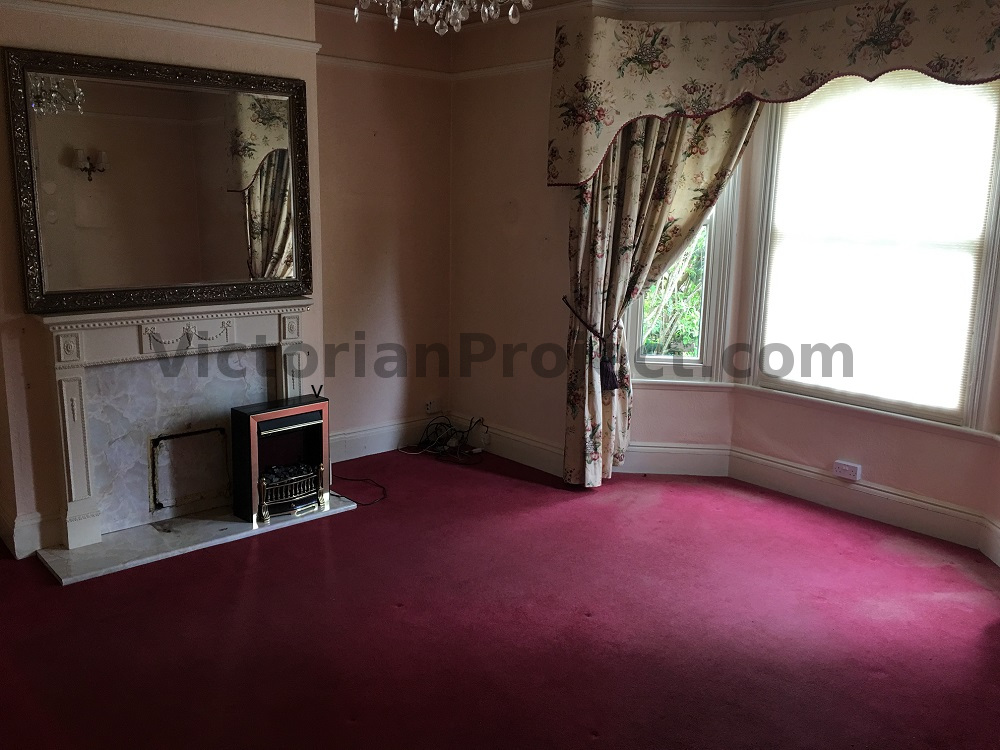
BEFORE: Dated & dreary with many damp patches to tackle. Not so much as a lick of paint in decades. Bricked up fireplace with makeshift hearth. 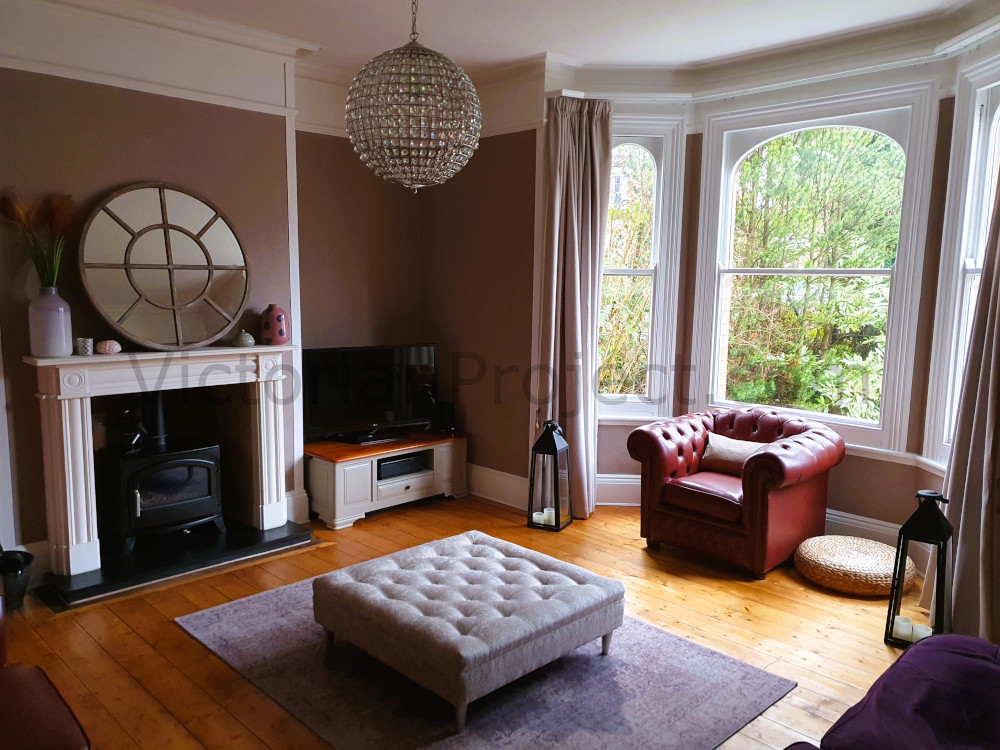
AFTER: Much brighter with a far warmer feel. All damp patches removed and fireplace restored to make the centre piece of the room. 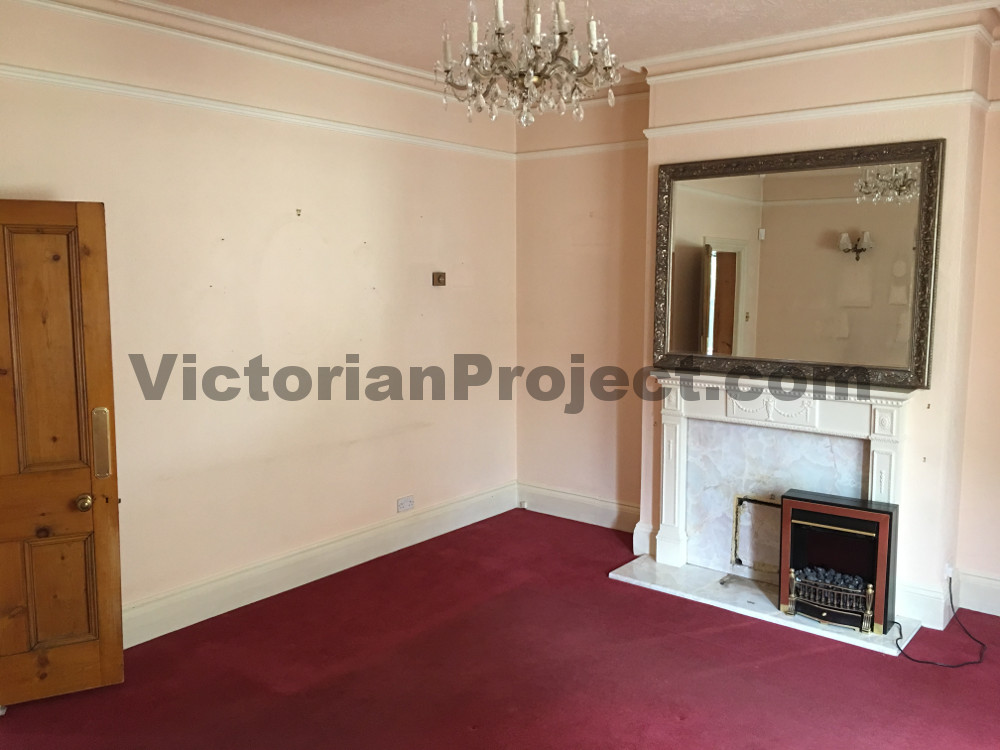
BEFORE: Multiple layers of wallpaper & paint plus a filthy carpet that doesn’t go with anything else. 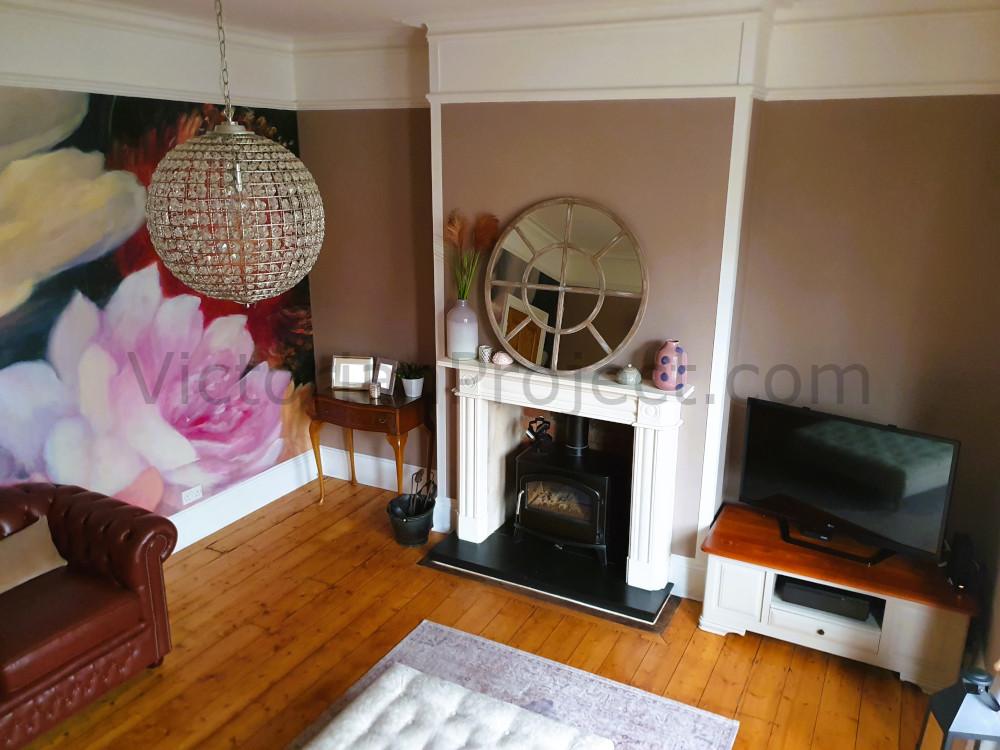
AFTER: Wallpaper stripped back & replaced with a striking mural & a lick of Earthborn clay paint. Carpet removed & original floorboards showcased. 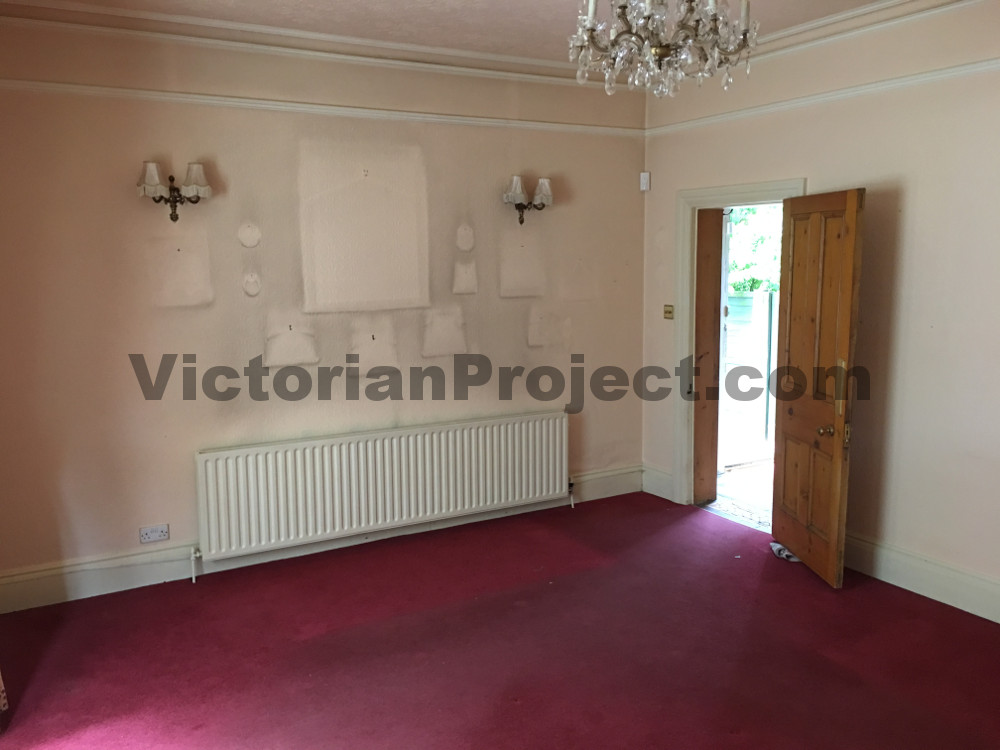
BEFORE: Filthy papered walls once covered with pictures & dated candlestick wall lights. 
AFTER: A clear single tone back wall joined onto the mural. Dated lighting replaced with a more modern option. 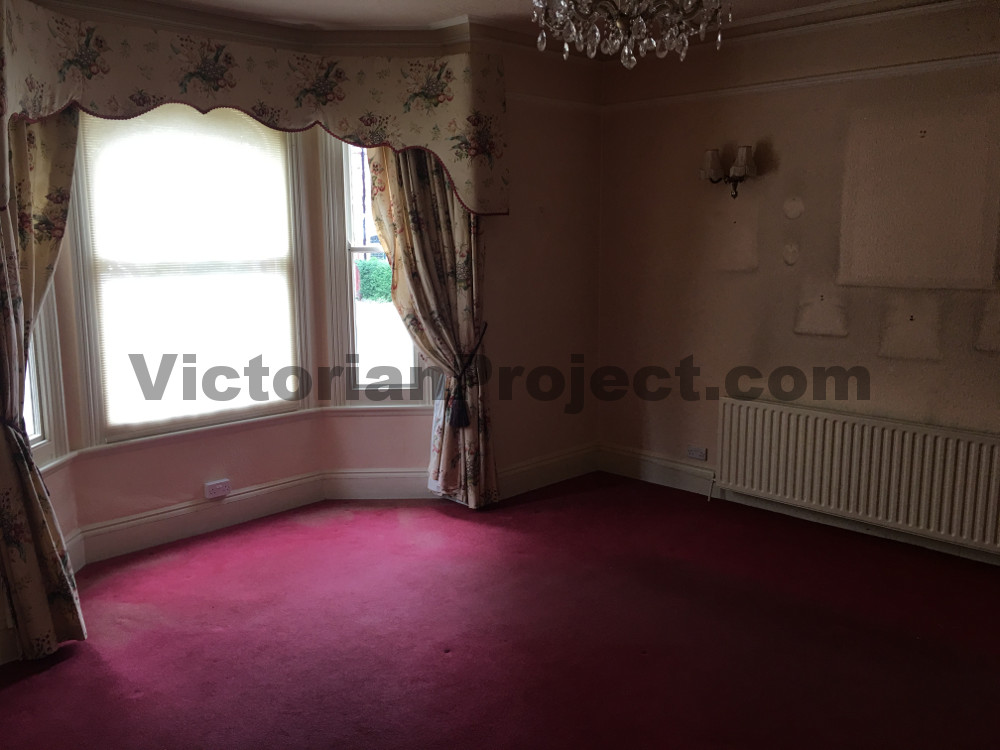
BEFORE: Overbearing curtains combined with a mix of depressing colours removes much of the light from the space. 
AFTER: Custom made tied back curtains mixed with more vibrant tones allows the light back in. 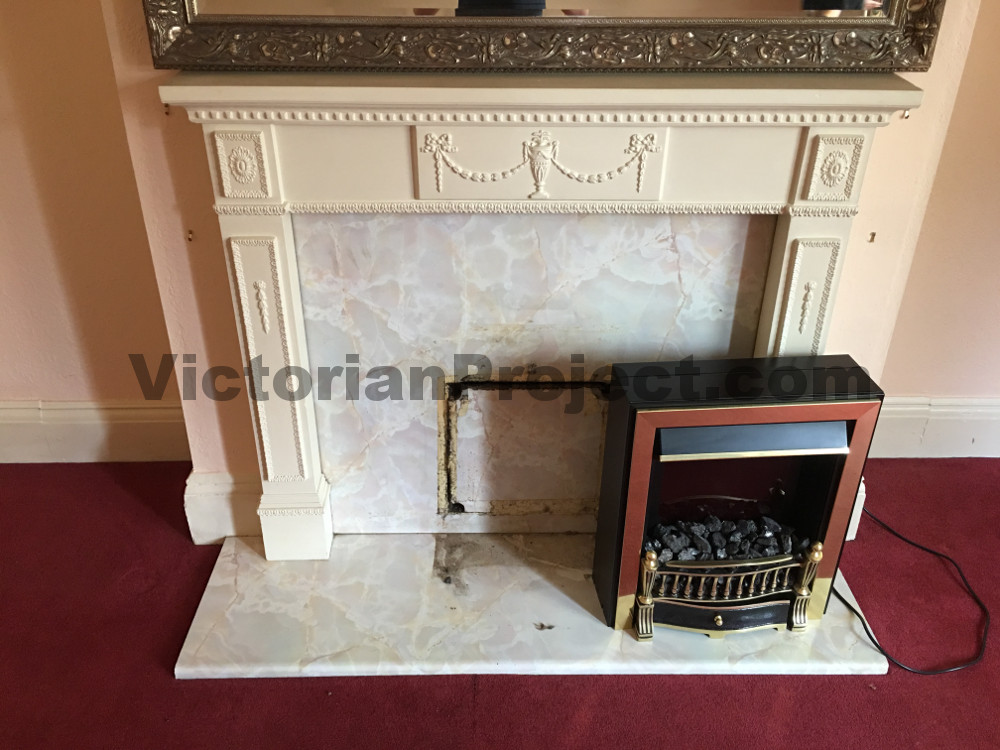
BEFORE: An electric fire in front of a bricked up fireplace. A cheap plaster surround on top of a hearth constructed out of an old kitchen worktop. 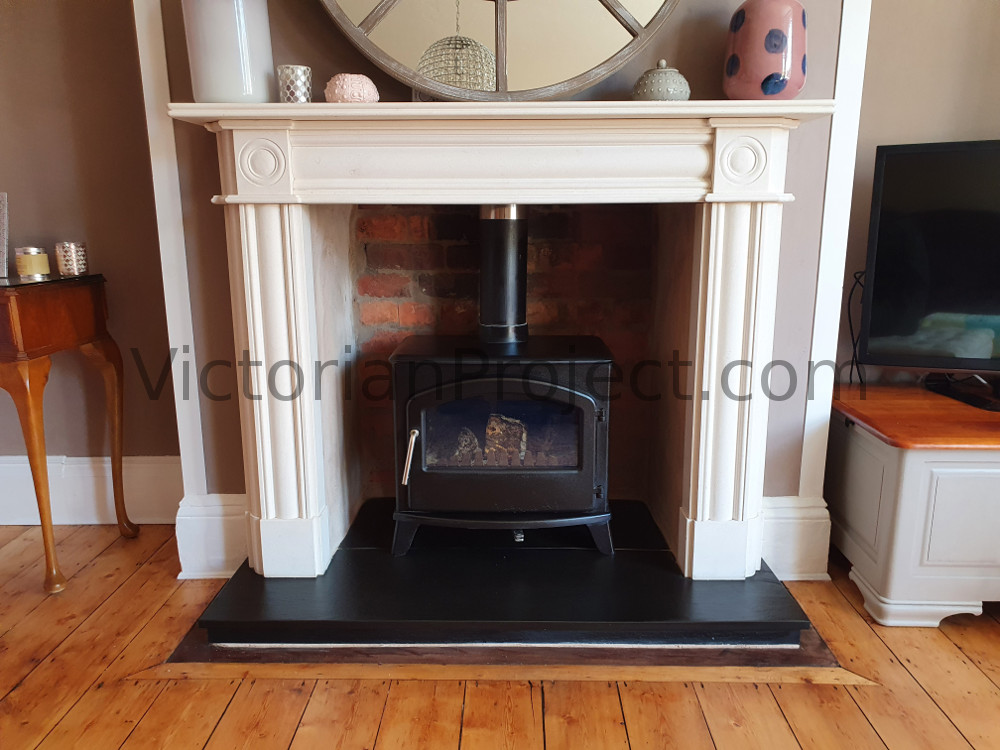
AFTER: Fireplace opened back up. Aegean limestone surround seated on a Welsh slate hearth. Finally a Broseley Serrano 7 Wood Burner insatllation.
Victorian Living Room Design – Roundup
Our first room complete, transformed from an unused, damp bodge to a vibrant & functional living space. Throughout the transformation, retaining original character & features was a must and anything new had to be in keeping with tradition. Original building practices such as lime products for the re-plaster maintained the breathability of the room with a complementing paint to enhance this. The brave mural filled the room with colour and provided a feature to draw the eye. Exhuming the old fireplace hidden for decades provided the perfect stage for a wood burning stove giving the final bit of ambiance to the room.
We made plenty of mistakes on our Victorian living room design journey with this being the first room of our project. It provided the right learning experience and many things to take into future rooms. Both in terms of DIY skills obtained and areas where we could reduce costs. It certainly took us longer than anticipated to transform our main living room. That said, we are very pleased with the end result. With the first room under our belts, next on to the bedrooms. [See also: 10 ‘Gotchas’ when buying a Victorian House – Knowledge is Power]
