

If you are like us, when you are a newbie to DIY & house renovation you will visit our friend Google for every new task you do. Whatever house you own you will undoubtedly have many ceilings to paint throughout the property. For a relatively simple task the internet is littered with many complex guides with extensive lists of steps to follow. In this short article we look at how to paint a ceiling for a great finish without all the fuss with some simple rules to follow.
What is the Victorian Project all about? Find out here.
Getting Started & Tools Required
Painting a ceiling requires very limited tools & materials to do. You will need a good emulsion paint in your chosen colour and in terms of tools, get yourself the following:
- A paint brush
- A paint roller
- A roller tray
- A long reach roller pole
You will also need something to stand on for the initial cut in. [See also: What To Do With A Wallpapered Ceiling? Be Careful!]
There are varying ceiling types you may be presented with but the approach is generally the same for each. Some examples include; a bare plastered ceiling of either gypsum or a lime based plaster product. A plastered ceiling that has already had previous paint coats. Or, a textured ceiling finished in an Artex type product or thick textured paper. We will discuss any additional considerations for the above later in the post. [See also: Remove Stubborn Wallpaper – Stripping Back]
Getting Started – Cutting In
In exactly the same way you would approach wall painting the first stage when painting ceilings is to cut in. Using a paint brush, paint a thin line of emulsion around the perimeter of the ceiling next to the walls or coving & around any features such as a ceiling rose. This is of course to hit those places that are difficult to reach with a roller. [See also: Earthborn Clay Paint Review – Breathable & Eco Friendly]
The Main Paint Roll – Rules For Painting A Ceiling
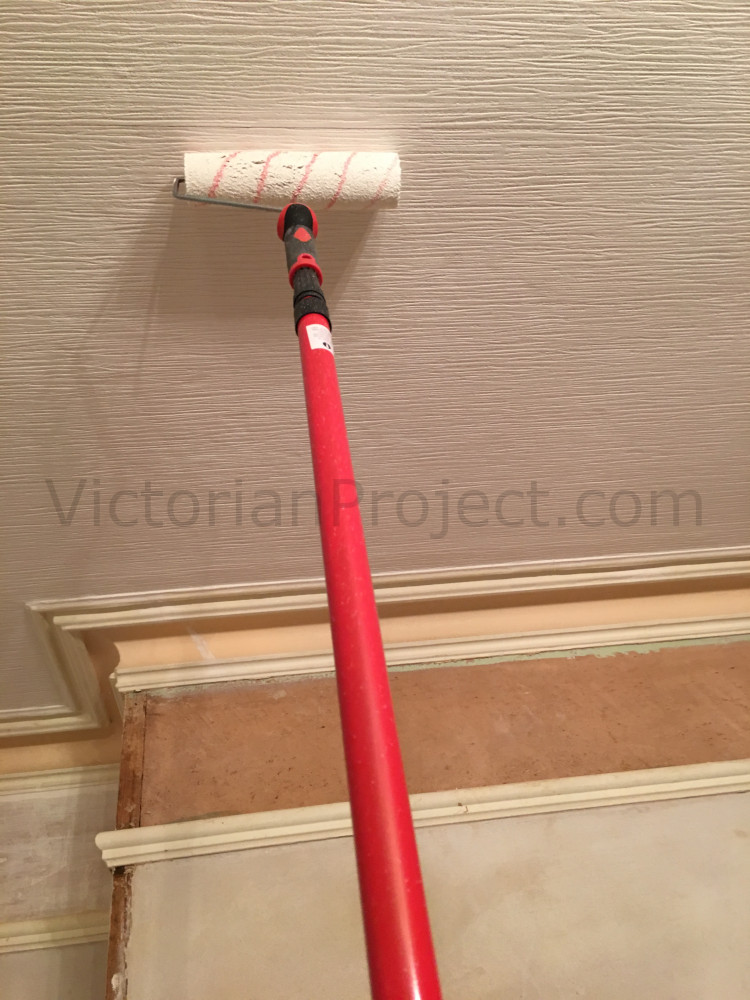
You are going to paint the bulk of the the ceiling space with a roller on a long reach pole. Always use a roller pole for this task as it is far easier than moving around a ladder or chair. It also allows you to continually assess from ground level that your coverage is even. [See also: Breathable Paint For Lime Plaster – What Are The Options?]
There are some simple rules for painting a ceiling here that you should try to adhere to. Firstly, try to role in straight lines towards a natural light source such as a window. This will give you a more even looking finish without roll marks highlighted by the light. Secondly, try to work in sections by dividing the ceiling space into quarters, completing each in full before moving to the next. This is shown in the example image below.
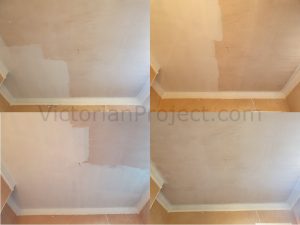
The purpose of this is that it will maintain your focus on each area and ensure that no patches are missed. Finally, use sufficient coats. You will likely need at least two coats of paint for any ceiling surface. If you are painting onto bare or fresh plaster you should always start with a mist coat. If you are looking to paint a textured ceiling you may find additional coats are required to get into all of those gaps & spaces. We found this to be the case with some of our ceilings and you might not see the areas you have missed until the current coat dries. [See also: Mist Coat Ratio & Painting New Plaster]
Touching Up On Missed Areas
Once you have fully rolled in your ceiling, stand back and check for any areas that you might have missed in your main paint roll. You can touch these up directly with the roller. [See also: Plaster, Putty & Paint – The Living Room Walls]
It is always worth checking your paint work in different lights as what looks complete in the evening with the light on may look patchy in the day particularly if your original surface was painted or your are painting textured ceilings. White on white paint can really show missed areas once it dries. [See also: Fix Damp in Victorian Houses and the Common Causes]
Follow the guidance of your chosen paint for how long to leave between coats. 24 hours is usually a good shout. [See also: Repairing Lime Plaster Walls – Hiding The Cracks]
And there is really little more to it than that…
How To Paint A Ceiling – Roundup
Painting a ceiling is a straight forward task and you shouldn’t get too caught up on finding the “right” way to do it. The simple rules for painting a ceiling to keep you on track are as follows…
- Always roll in the direction of a natural light source such as a window.
- Divide the ceiling space into quarters to maintain focus.
- Use sufficient coats. To paint a textured ceiling, you may require additional coats and always start with a mist coat if painting bare/fresh plaster.
A ceiling is no more difficult to paint than a wall and you really shouldn’t go far wrong. [See also: Open Up A Fireplace & Log Burner Installation]
